


Easy Video- Don’t Flip Out!
Overview
Need your students to have a voice? Let them record their authentic learning digitally and share it with others. Social interactions and learning are amplified when using Flip. Learn more about Flip by watching the video introduction.
Note: Flip was previously called Flipgrid so you may still see current videos calling it Flipgrid instead of Flip.
Learning Objectives
Students will:
- Be able to create a video within a Flip Topic that demonstrates their learning.
- Be able to interact with classmates’ videos within the topic given.
Vocabulary
Vocabulary Words:
- Topic: The topic is what your video should be about or focused on.
-
Record: To record is when your device (iPad, Chromebook, computer) captures your live actions, your voice, and/or both.
-
Grid: A grid is lines that cross each other to form squares. For Flip, many videos together form a grid about the same topic.
-
Selfie: A selfie is a picture of yourself to have as the front cover of your video.
Pre-planning
To prepare for this lesson:
- The teacher must use an internet browser to create a new topic for a Flip. All devices allow for the creation of videos via the Flip App or Website.
- Watch this video to learn how to use Flip.
- The teacher uses their Google or Microsoft Office email or other credentials and signs up for a free Flip account.
- The teacher will follow on-screen prompts to answer questions about their teaching position.
- Then follow the prompts to create a group and invite students, post a topic to prompt your students to respond, and begin commenting on your student's video, text, or audio.
Accommodations
See the Accommodations Page and Charts on the 21things4students website in the Teacher Resources.
Steps
Have you ever taken a selfie or recorded a video of yourself?
- The teacher will say, "Today you are going to create a video to share what you have learned with your classmates".
- Direct students to Flipgrid website or app.
- Have students type in your Topic Code (See pre-planning).
- Say, "You have now entered our classroom Flip. This tool makes a grid of videos from our classroom that shows what we have learned. Everyone will create their own video".
- Directions: Students will have a given amount of time (determined when the topic was created) to tell what they have learned about a topic. Have students touch or click the green circle “add” button to make their video. (Make sure student devices are set up to allow the use of the camera and microphone).
- Students press the red camera button to record their video and then the red pause to stop at any time. They can continue recording from where they left off, or delete their video and start over. Give students three to five minutes to record their video. Ask them to not go any further once they have finished recording.
- When everyone has finished recording, have students select the green arrow for the next step, reviewing the video. Once students have reviewed their video, they can click the green arrow to continue.
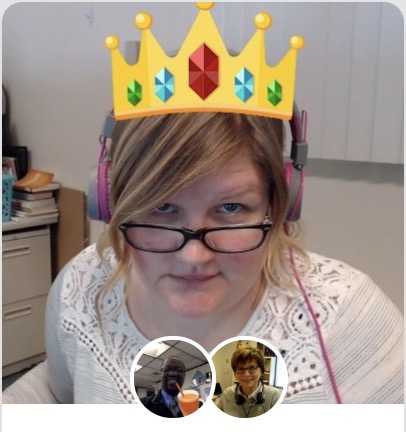
- Next, students must take a selfie to serve as the thumbnail for their video. This is the picture that will be shown in the classroom topic. Students can then decorate their selfies with the provided stickers and then press the green arrow to continue.
- Lastly, students are given a screen to enter their information. Students do not have to completely fill this in. They may just type their first and last name, or first name and last initial, and then press submit.
- Students have now submitted their videos on the topic. Once they select complete, they will be taken back to the videos for that topic. (If you set your topic up to have responses moderated by the teacher, you may have to log in and approve the responses for students to see).
- Direct students to watch other videos that were submitted and react by selecting the provided options (heart, light bulb, think face, rocket, cool face). The provided options may be explained to students or associated with a rubric that students create. For example, the light bulb could mean that after watching the video, the student had a thought to share.
Assessment Options
Different options for assessing the students:
- Observations
- Check for understanding
-
Students will show their mastery by providing their authentic opinions, debates, and or feelings through the Flip portal focused on the specific topic proposed by the teacher, and reacting to other students’ videos. The teacher can observe student video submissions and reactions via the teacher portal.
MITECS Competencies & ISTE Standards
MITECS: Michigan adopted the "ISTE Standards for Students" called MITECS (Michigan Integrated Technology Competencies for Students) in 2018.
Global Collaborator
7b. With guidance from an educator, students use technology tools to work with friends and with people outside their neighborhood, city and beyond.
Devices and Resources
Device: PC, Chromebook, Mac, iPad
Browser: Chrome, Safari, Firefox, Edge, ALL
App, Extension, or Add-on:
Android App - (For responses only)
iOS App - (For responses only)
Websites:
Flip
Getting Started with Flip for Students
The Ultimate Teacher Guide to Flip
CONTENT AREA RESOURCES
ELA
- Create book reviews about books in their reading box and give a recommendation to their classmates.
-
Students record themselves saying rhyming words with the word ending the teacher provides in the topic.
Integrated Arts
- PE: Students demonstrate how to throw a football or do a physical activity from start to finish.
- Art: Explain how they drew or crafted a project.
- Music: Students demonstrate their understanding of rhythm by recording different beats for their classmates.
Math
- Have students demonstrate their counting skills by counting by 1’s, 5’s, 10’s.
-
Students demonstrate how to solve simple math problems with objects in the video.
Science
- Have the student explain their understanding of weather, seasons, and other topics.
-
Students can create a model then use Flipgrid to explain that model. Think water cycle or cycle of a tree/plant.
Social Studies
Students explain their understanding of their role in a community and how their role impacts the rest of society.
CREDITS
This task card was created by Jeremie Coplin & Lacey Khon, Kalamazoo RESA, February 2018. Updated October 2023.