
Screencasting
Show me videos can be extremely helpful for learners, especially in this age of digital media. You can create and post help resources online with a variety of free software.
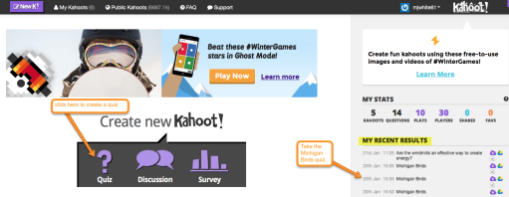
You can capture your screen, a photo to annotate and explain, or create a video of the steps that students need to follow. Below is an image of a screen capture.
Screencasting
There are numerous tools available to capture one's screen whether you are using a PC or a mobile device. The focus will be on resources that not only capture the screen but also allow you to draw and type text on the video.
There are tools that have a fee and those that are free. Two FREE popular resources to use on a PC are Screencastomatic and Screencastify.
Steps:
1. You will choose between Screencastomatic and Screencastify.
a. Screencastomatic is a web based tool and works on both Windows and Apple computers. The free version allows you to record up to a 15 minute video, publish to YouTube and save as a video file. The pro version which has a fee has additional features such as editing tools, draw and zoom and the ability to publish also to Google Drive, Vimeo and Dropbox. Use these tutorials to learn how to use Screencastomatic.
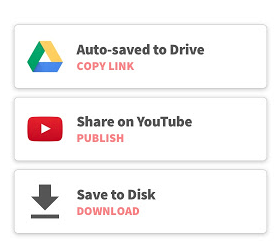
b. Screencastify is also a web based tool and can easily be accessed by installing the Screencastify extension on your Chrome Browser. You can enjoy unlimited recordings up to 5 minutes each - with no watermark, ever! Video trimming and export options have been unlocked for free users. Videos can auto-saved to Google Drive, shared on YouTube or downloaded onto your device.
2. Choose the tool above that works best for you. (you may also use another resource if you wish)
3. Next choose one or two things you want your audience to learn (keep it simple).
4. It is best to always create an outline or a script for the video. Here is a Storyboard Template to use or you can use one of your own choosing.
5. Research has shown that students lose focus if the video is too long. Google did some recent research that the ideal video is 3.5 minutes long.
6. Practice your script aloud!
7. When you are ready, make sure you have your browser screens open so that you can easily go between them as you create your video. Sometimes it takes a moment to load a screen because your internet is slow so if you have all the resources open you can just tab between them as you are teaching the concept. You are not limited to the internet though. You can create a how-to video on how to use a piece of software on your computer.
8. After you have made your recording you may want to edit it first especially if you would like to break it into segments. Here is a great choice for teachers.
a. WeVideo is a great option. It has a Free option that allows you to upload 5 minutes a month up to 1GB. There is an educator version that is $249.00 a year which allows students to create videos in a private COPPA-compliant environment monitored by a teacher. Free Personal accounts do not include collaborative features, administrator security control or advanced editing tools like green screen, screen recording and slow motion. For assistance with WeVideo check out their tutorials.
b. If you have an Apple device, iMovie is also a great choice to edit your video. On your iPhone or PC, open up iMovie and follow the prompts to create a professional looking video using video clips, titles, music, and effects. There is also a feature to create a Movie Trailer. iMovie trailers let you quickly create fun, Hollywood-style movie trailers from all your footage.
9. Finally you need to store it in the Cloud for easy access by your students. You will want to check with your Tech Director to determine if the resource you choose is accessible to your students. Here are some popular choices.
a. Youtube
b. Schooltube
c. Teachertube
d. Vimeo
10. Share your storyboard and video URL with your instructor. We hope you had a fun time creating your screencast!
Go to the Final Assignment once you have completed all the steps in this section.
Standards
Addressing the ISTE Standards For Educators
Learner
1a. Set professional learning goals to explore and apply pedagogical approaches made possible by technology and reflect on their effectiveness.
1c. Stay current with research that supports improved student learning outcomes, including findings from the learning sciences.
Leader
2b. Advocate for equitable access to educational technology, digital content and learning opportunities to meet the diverse needs of all students.
2c. Model for colleagues the identification, exploration,
evaluation, curation and adoption of
new digital resources and tools for learning.
Citizen
3a. Create experiences for learners to make positive, socially responsible contributions and exhibit empathetic behavior online that build relationships and community.
3c. Mentor students in safe, legal and ethical practices with digital tools and the protection of intellectual rights and property.
Designer
5a. Use technology to create, adapt and personalize learning experiences that foster independent learning and accommodate learner differences and needs.
Facilitator
6a. Foster a culture where students take ownership of their learning goals and outcomes in both independent and group settings.
6b. Manage the use of technology and student learning strategies in digital platforms, virtual environments, hands-on maker spaces or in the field.
6c. Create learning opportunities that challenge students to use a design process and computational thinking to innovate and solve problems.
6d. Model and nurture creativity and creative expression to communicate ideas, knowledge or connections.
Analyst
7a. Provide alternative ways for students to demonstrate competency and reflect on their learning using technology.