
Notetaking

Note-taking is a skill that students need to learn at an early age as it will carry throughout their school years as well as their careers. There are note-taking applications that are specific just to note-taking. Applications like Google Docs and Microsoft Word can also provide an excellent way to take notes. The advantage of these tools is that you and your students can collaborate on any notes that are being taken.
The process of note-taking can be shared, the notes can be checked for accuracy, and then can be used as study notes by all in the class. With everyone taking notes together important information will not be missed.
There are some experts who say taking notes by hand during lectures is the best way to retain the information. You may encourage your students to take notes by hand but whether they do it by hand or by typing the notes they can still be shared afterward by sharing them in digital form. Note-taking is also an important skill when doing research to capture the main ideas and cite them too.
When students are taking and sharing their notes here are some features to remember:
- Organize key ideas and supporting ideas.
- Use bullet points.
- Use visual techniques, e.g., highlighting, graphics, colors, and underlining to identify main points.
- Use abbreviations and symbols to show connections between ideas.
Below are some note-taking applications. Go through each of them and then decide which one/s you would like to learn more about to use with your students.
1. Which note-taking application did you choose?
2. Are you going to use it yourself, with your students, or both?
3. Hopefully, you will have your students use note-taking during the project you have chosen.
- If so, describe the activity you will do with the students to teach them note-taking.
- If not, when and what activity would you do with the students to teach them about note-taking?
Google Docs and Microsoft Office 365
In the previous section, you saw that students can collaborate on projects together using a Word document. Collaborative note-taking is very easy when a student starts a document and then shares it with others using their emails and the big BLUE SHARE button. Those who have access to the document can take notes in real-time.
A college student wrote this post on how note-taking in Google Docs changed her note-taking skills. She used different colors for things she knew would be on the test and she also put her notes into nice outline form which is easy to do in Docs or Word because outlining tools are built into them.
Below are some tweets from a college professor.
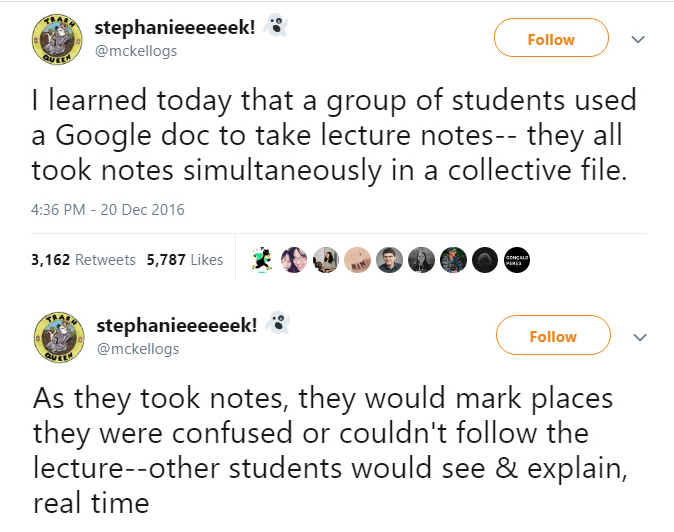
There are cons to collaborative note-taking. Many of these applications have built-in chats which cannot be turned off. The teacher may believe the students are working hard taking notes in their class and they may be using the chat feature instead. The feature was built-in on purpose so people could communicate and collaborate together on a document. Read the article to learn more about what kids are doing.
If you do find your students are using the chat feature in class or at home, you will want to make sure and do a lesson on digital citizenship and make sure they are not bullying or leaving others out. We cannot abandon these important tools because kids will pass notes on paper, phone messages, or through Docs. Since it is a digital chat you can teach the students how to screenshot something inappropriate to share with you or their parents.
Collaborative note-taking using the same document is very helpful in staff meetings and professional development. The leader can send out the agenda electronically and share the document with everyone in Docs or Word. One person can be selected to be the official note-taker but everyone else in the room can add their ideas and notes to the document. Additional websites and ideas that can beef up the notes can be added.
The Insert Comment feature (part of Docs and Word - highlight portion of text and go to Insert>Comment) can be used for questions and anyone who has the answer can answer the questions.
Finally, let’s say you want to split the page into columns so that notes can be on both sides of a page. The easiest way to do that in Word/Docs is to create a table by going to Insert>Table>and choose two columns and one row. It is also handy if you want to insert images next to text. You can also add in a horizontal line from the Insert menu if you want to split off one section from another.
|
|
Google Keep
Google Keep is part of the Google Suite of Applications. You can access it by going to http://keep.google.com. If you are using Gmail or your calendar if you look over to the far right there is an icon for Keep so you make a quick note or access them when you are in your mail or calendar.
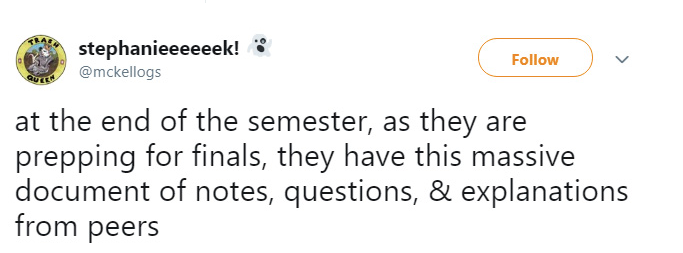
Google Keep looks like a basic sticky note-taking app. It functions like a digital bulletin board covered in sticky notes. You can open Keep> Notes and add a title, begin taking notes, color code it, add an image, add a reminder, and most importantly when you click on the little person with the + sign you can add others to collaborate on your Keep note. Every time you or the person collaborating on the note makes a change it makes a change on all the collaborator’s notes. You can also create labels to organize your notes.
There is a Copy to Google Doc feature, which turns any note into an editable Google Doc where you can add images, comments, and links to files. Once you have created your note, click on the three dots on the note and you will see the ability to copy to Google Doc. This feature is nice because if you have multiple people taking notes in Keep you can more easily organize the notes later in Google Docs. Once transferred to Google Docs the group of collaborators can manipulate the notes for ease of studying.
Use these step-by-step instructions from Google to download and use Keep to take notes.
Web clipping is something else that is available when using Keep. If you are using the Chrome browser, you can add the Google Keep Chrome Extension. When you come across a webpage, image, or quote that you want to save for later, the Google Keep Chrome Extension, easily saves them to Google Keep.
Google Keep's most useful feature is audio transcription. It is only available on your mobile device in Google Play or the Apple Store. When you record your thoughts with Keep’s audio recorder in its mobile apps, Google transcribes the text and records the audio. Here are instructions for recording and sharing.
Google Keep also has an image to text transcription tool. Using Optical Character Recognition (OCR), Keep can transcribe text from pictures for you, so you don’t have to worry about typing up notes from a meeting. Just take a photo of notes taken at a meeting on a whiteboard, select “Grab Image Text” and Keep will transcribe your note.
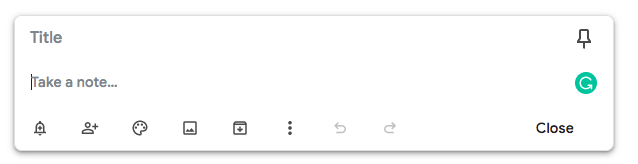
Below are 15 ideas for students.
Gingko
Gingko is an interesting application created for students to collaborate on their note-taking and to organize their thoughts for writing.
What can you use Gingko for?
- Writing
- Your book or novel
- Your screenplay
- Your thesis or research paper
- Software specs
- Organizing
- Your projects
- Personal to-dos
- Your development workflow
- Your ideas.
- Your study notes.
- Working together on any of the above.
Your free account only allows you to create 10 trees, and 100 cards per month. You can upgrade to a paid account to get unlimited cards and trees.
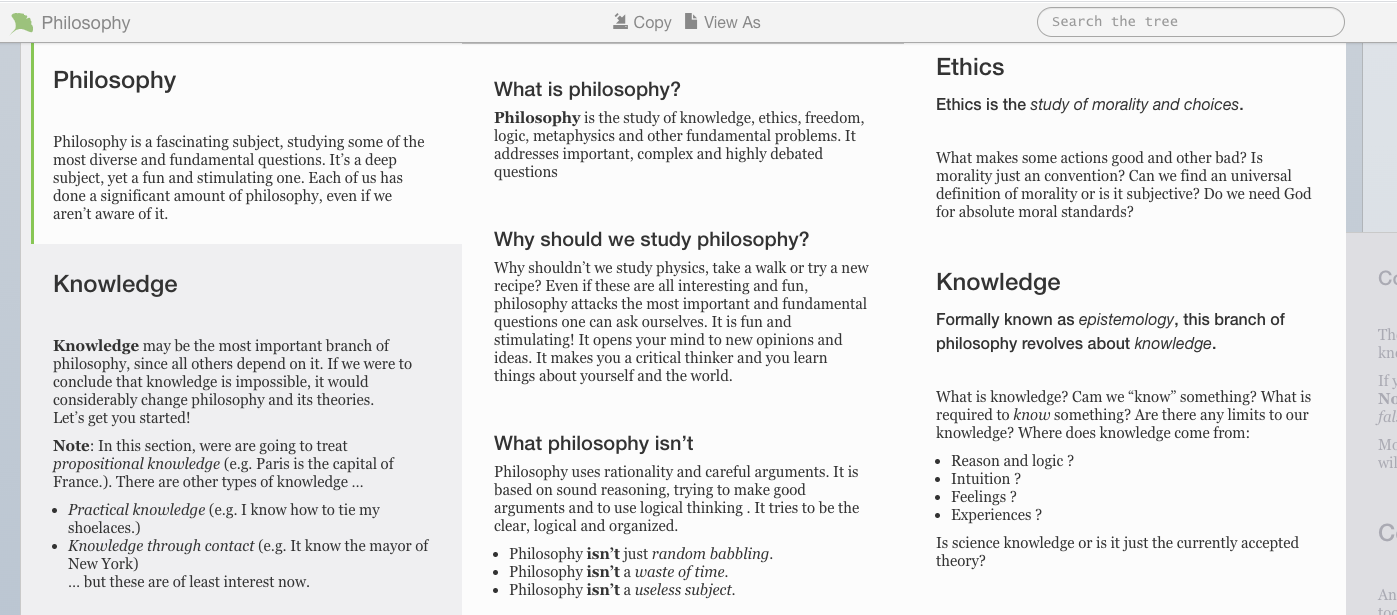
This what Gingko lets you do. All you need to do is:
- Create an account (5 seconds).
- Make a “Tree” for your class, and share the link on the board.
- Watch as, together, you build the tree of knowledge for your class
You as the teacher can set up the Gingko tree before your lecture and share it with your students. The students can then begin taking notes in the correct sections. The notes can be expanded on in additional lectures or as a homework assignment.
Here are several tutorial videos to watch from the developer of Gingko.
As you learned in this section, note-taking is a good skill to have. There are a lot of ways to take notes, collaborate on them, and use them.
Finally, there are multimedia bulletin boards. They are another method for students to take notes, brainstorm, give feedback to each other, and collaborate.
Let's move on to Multimedia Bulletin Boards.
Standards
Addressing the ISTE Standards For Educators
Learner
1b. Pursue professional interests by creating and actively participating in local and global learning networks.
Leader
2b. Advocate for equitable access to educational technology, digital content and learning opportunities to meet the diverse needs of all students.
2c. Model for colleagues the identification, exploration, evaluation, curation, and adoption of new digital resources and tools for learning.
Citizen
3a. Create experiences for learners to make positive, socially responsible contributions and exhibit empathetic behavior online that build relationships and community.
3b. Establish a learning culture that promotes curiosity and critical examination of online resources and fosters digital literacy and media fluency.
3c. Mentor students in safe, legal and ethical practices with digital tools and the protection of intellectual rights and property.
3d. Model and promote the management of personal data and digital identity and protect student data privacy.
Collaborator
4a. Dedicate planning time to collaborate with colleagues to create authentic learning experiences that leverage technology.
4b. Collaborate and co-learn with students to discover and use new digital resources and diagnose and troubleshoot technology issues.
4c. Use collaborative tools to expand students' authentic, real-world learning experiences by engaging virtually with experts, teams and students, locally and globally.
4d. Demonstrate cultural competency when communicating with students, parents and colleagues and interact with them as co-collaborators in student learning.
Designer
5a. Use technology to create, adapt and personalize learning experiences that foster independent learning and accommodate learner differences and needs.
5b. Design authentic learning activities that align with content area standards and use digital tools and resources to maximize active, deep learning.
Facilitator
6a. Foster a culture where students take ownership of their learning goals and outcomes in both independent and group settings.