
Keynote

KEYNOTE

Keynote Overview
You can use Keynote to create compelling presentations with fun animations, interesting transitions, and professional polish.
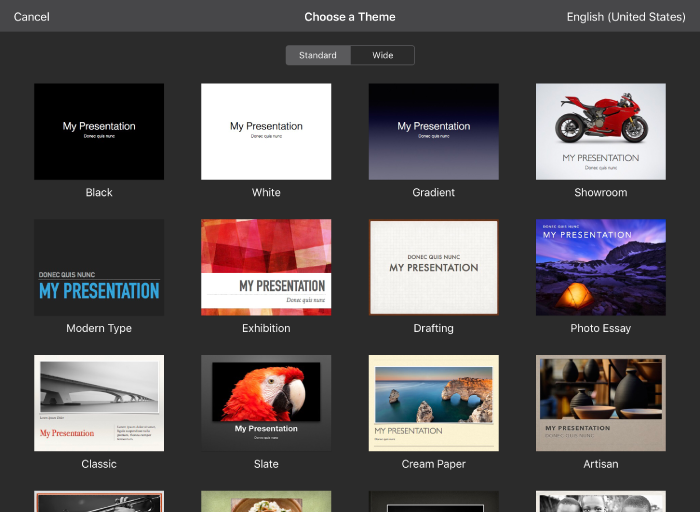
To create a Keynote presentation, you always start with a theme, then modify it however you want. Slides in a theme include placeholder images and text styled as headlines and body content.
To build your presentation, you replace placeholder content with your own content, or delete placeholders you don’t need. You can also add other objects—like shapes, photos, and charts—to any slide.
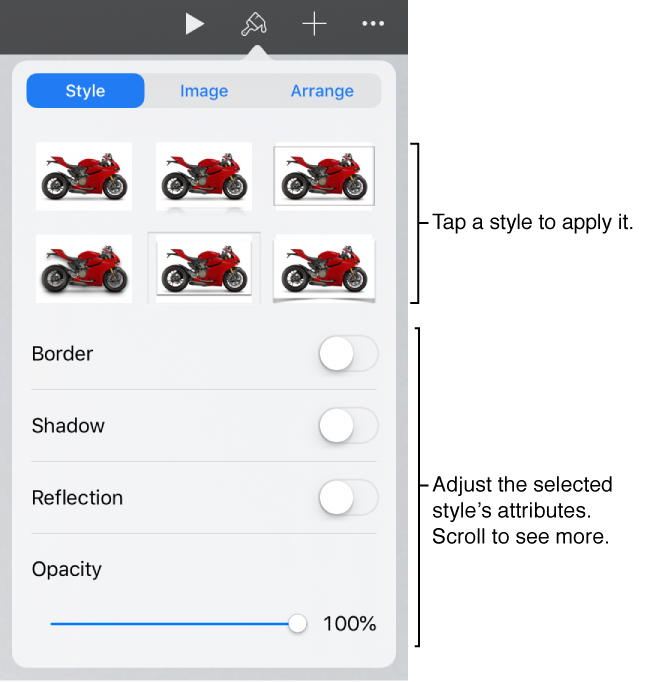
When you select an object (an image, shape, chart, table, or cell), then tap , you see formatting controls for the type of object you selected.
You can quickly change the look of the selected text or object by applying a new style to it. Tap one of the alternative styles to change the object’s look, or use the style options to customize the object’s appearance however you like.
Touchscreen Editing
Finger gestures are crucial to using Keynote on your iOS device. These are the gestures you need to know:
Tap
Using one finger, quickly and firmly touch the screen, then lift your finger. Use this gesture to select an object or activate a button.
Scroll, swipe, flick
Slide one finger up and down or side to side on the screen to move the content within the screen or within a pane. This action allows you to see items that are currently beyond the edges of the screen or more options within a pane. Scroll quickly by swiping or flicking one finger rapidly across the screen.
Swipe or flick up and down to scroll.

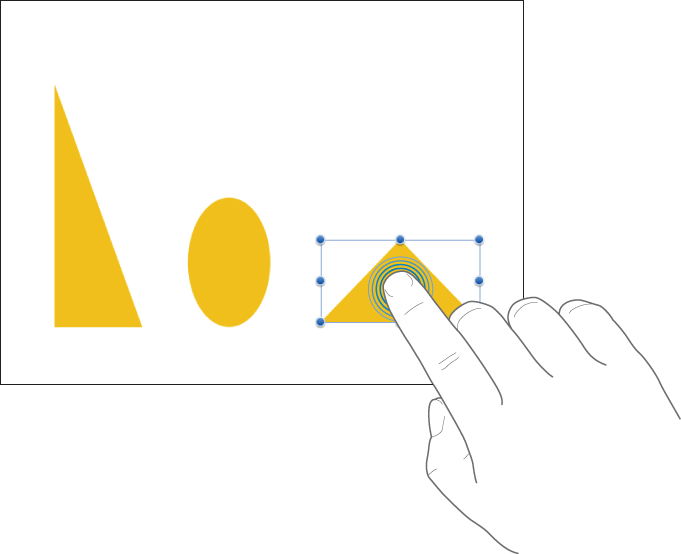
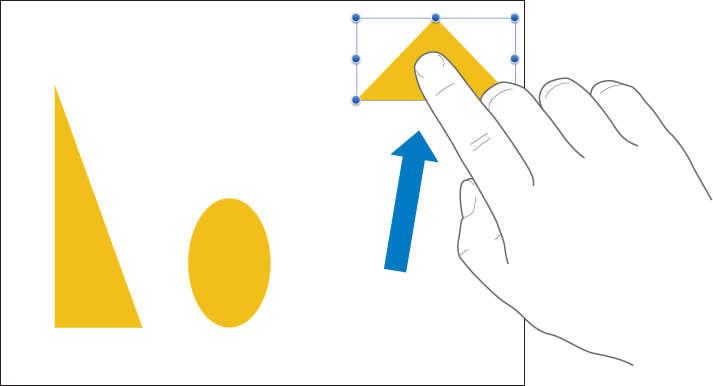
Drag
You can drag to move an object, or to resize an object or selection range.
To move an object, touch and hold your finger on the object, then drag it to where you want it. To resize an object, tap it, touch and hold one of the selection handles, then drag to resize.
Select multiple objects
Select as many objects as you want by touching and holding one object on the screen, then tapping the other objects with another finger. Use both hands if it’s easier.

Pinch open to zoom in
Place two fingers on the screen and spread them apart. This action allows you to see a close-up of items on the screen. Pinch open quickly to immediately increase the slide size. An indicator displays the current slide magnification as you pinch.

Pinch closed to zoom out
Place two fingers on the screen and bring them together. This action allows you to see more items on the screen. Pinch closed quickly to immediately reduce the slide. An indicator displays the current slide magnification as you pinch.

Add or Delete Slides
Add a slide
Tap "+" at the bottom of the screen, then tap a slide layout.
Tip: You can also add a slide by dragging an image from the media browser or from another app to the slide navigator or light table view.
After adding a slide, add your own content to it, including text, shapes, tables, charts, photos, and videos.
Duplicate slides
- Duplicate a slide in the slide navigator: Tap a thumbnail, tap it again, then tap Copy. Tap the thumbnail you want the duplicate to follow, tap it again, then tap Paste.
- Duplicate multiple slides in the slide navigator: Touch and hold one slide while tapping others with another finger, then lift the finger from the first slide and tap Copy. Tap the thumbnail you want the duplicates to follow, tap it again, then tap Paste.
- Duplicate a slide in light table view: Tap a thumbnail, then tap the "duplicate page" icon at the bottom of the screen.
- Duplicate multiple slides in light table view: Tap Select at the bottom of the screen, tap the thumbnails you want to duplicate, tap "duplicate page," then tap Done.
Insert a slide from another presentation
- Open a presentation that contains the slide you want.
- Tap the slide in the slide navigator.
- If you don’t see the slide navigator, pinch closed on the slide to zoom out.
- Tap the slide again, then tap Copy.
Tip: To select and copy multiple slides, touch and hold one slide while tapping others with another finger, then lift the finger from the first slide and tap Copy.
- Tap Presentations.
- In the presentation manager, tap the presentation where you want to insert the slide.
- Tap anywhere in the slide navigator, then tap again.
- Tap Paste.
Delete a slide
- Delete a slide: Tap a thumbnail, then tap it again and tap Delete.
If you’re in slide view and don’t see the slide navigator, pinch closed on the slide to zoom out.
- Delete multiple slides: Touch and hold one thumbnail while tapping others with another finger, then lift the finger from the first slide and tap Delete.
Tip: In light table view, you can also tap the thumbnail, then tap at the bottom of the screen. To delete multiple slides, tap Select at the bottom of the screen, tap thumbnails, tap , then tap Done.
For more information on Keynote, isuch as animating and presenting slides, see the Apple Support Guide below:
K-2 USING KEYNOTE

Students will use Camera app, Photos app, and Keynote to demonstrate their understanding of the shapes around them.

Instructions
- Open the Camera app and take pictures of circles, triangles, squares, rectangles, and diamonds.
- In the Photos app open each picture and edit them by using the Markup tool. Outline the shapes you found in each image.
- Open the Keynote app and create a slide for each shape. Add the shape from the objects inside of Keynote. Then add your shape photos try adding photos from your camera roll.
- When complete have the students share the final project to the teacher through Classroom/Airdrop/email.
3-5 Using Keynote

Create a Keynote lesson then send it to Books for students to mark it up

Instructions
- As a class research Earth Day. What does it mean to Reduce, Reuse, Recycle.
- Take the iPad outside and take pictures and videos of living, non living, trash that can be recycled, and anything else related to Earth Day.
- Create a Keynote presentation adding all pictures and videos taken
- Using Pages create a script explaining each picture and video.
- Split screen Pages with Keynote, using teleprompter in Pages, record your voice in Keynote explaining each slide.
- Add transitions, animations, and other features to the presentation
- When finished, students share their work to the teacher through Classroom/Airdrop/email.
6-8 USING KEYNOTE

Students use pictures of events and animate their movement to the correct position on a timeline.

Instructions
- Using a series of events in history, students research images to add to a timeline.
- After importing the images, students create a timeline with the dates that the events happened. They do not match the images with the correct dates yet.
- Using the animate tool, create a path for the image to follow from their starting location to the correct date. Repeat this animation for each image.
- Use the Record Audio tool within Keynote to explain why each image happens at the date on the timeline.
- When presenting, change the order of animation to start the audio first before the images move.
- When finished, students share their work to the teacher through Classroom/Airdrop/email.
9-12 USING KEYNOTE

Students will create a study guide for themselves and others to use in Language classes and other classes with vocabulary terms.

Instructions
- As a class use Safari and other resources to outline the key vocabulary and definitions.
- Split screen Safari and Keynote and create a slide for each vocabulary word.
- Add the correct definition/image and several incorrect definitions/images. (Optional: record voice reading the words, images, and definitions aloud).
- Create an animation such as “Path” that moves the vocabulary word to the correct definition/image.
- When complete split screen with Keynote and Timer app. Test how long it takes each student to complete the study guide and how many they got correct.

The iPad offers many built in Accessibility tools that allow every student in your classroom to feel empowered and engaged. Here are a few ways you can reach all learners using these Accessibility Tools in your classroom:
Use Keynote to chunk material into short bites of information on each slide.
- Teachers can add visual supports using shapes and drawings to help struggling readers
- Teachers can add videos and audio recordings to support student learning and motivation
- Allow students to draw/sketch an idea on keynote slides
- Create slides on a topic, allowing students to respond to slides with their own answers/ideas (e.g.,ask questions on odd numbered slides 1, 3, 5, 7. Students answer the questions on the even number slides 2, 4, 6 and 8) using audio, video or handwriting.