
Notes
Notes
Take Notes
Use Notes to jot down important information, sketch ideas, and keep things organized. You can add attachments—like photos, scanned documents, web links, and maps—to a note, and you can lock a note to keep it private. You can also share a note so others can view and edit it.

Store your notes securely in iCloud. Go to Settings > [your name] > iCloud, then turn on Notes. Your iCloud notes—and any changes you make to them—appear on all your iOS devices and Mac computers where you’re signed in to iCloud with the same Apple ID.
Note: If you’ve been using an earlier version of Notes, you may need to upgrade your iCloud notes to use all the features—sketching, checklists, paragraph styles, password protection, adding people, and more.
Store certain notes only on your iPad. Go to Settings > Notes, then turn on “On My iPad” Account. Notes in this account appear only on your iPad. Your notes in iCloud won’t be affected.
Create a new note. Tap  . The first line of the note becomes the note’s title.
Ask Siri. Say something like: “Create a new note.”
Tip: You can quickly create a note or resume work on your last note by tapping the Lock screen with Apple Pencil (on supported models). On other iPad models, you can do this if you add the Notes control to Control Center. To change the Lock screen behavior, go to Settings > Notes > Access Note from Lock Screen.
Make the note fill the screen. While viewing a note in landscape orientation, tap or turn iPad to portrait orientation.
Set the default account for adding or editing notes using Siri or Today View. Go to Settings > Notes > Default Account.
Tip: If you add the Notes widget to Today View, you can create and view Notes right from there. In Today View, tap Edit at the bottom.
Delete a note. In a note, tap . Or in the notes list, swipe left on the note.
If you change your mind, open the Recently Deleted folder. Tap the note you want to keep, tap in the note, then tap Recover.
Format Notes and Add Attachments
Format text and add tables, lists, scanned documents, photos, videos, and sketches.

Change the text style. Tap "Aa," then select the style.
Set a default formatting style for the first paragraph. Go to Settings > Notes, then tap New Notes Start With. Choose Title, Heading, or Body.
Start a checklist. Tap  , then enter the first item in the list. To remove the checklist format, tap again.
Add a photo or video to your note. Tap "+". Take a new photo or video, or tap Photo Library to select and add existing photos and videos.
If you want photos or videos you take in Notes to be automatically added to the Photos app, go to Settings > Notes, then turn on Save to Photos.
Add info from another app. When you’re in another app and find something that you want to add to Notes (like a location in Maps, a webpage in Safari, or a PDF in Files), tap Share or "Sharrow", then tap Add to Notes. You can create a new note or add the attachment to an existing one.
Mark up an image or PDF. Tap the image or PDF in your note, then tap  .
.
Change the preview size of attachments. Touch and hold an image, sketch, or PDF attachment in a note, then choose a size for the preview.
Write a Note by Hand
Use the handwriting tools to quickly write or draw with your fingertip or Apple Pencil (on supported models).
Create a handwritten note or drawing. In a note, tap , then start writing or drawing with your finger or Apple Pencil. Change to a different tool by tapping it. Tap the color tool to choose a different color.

Tip: To insert a drawing within existing text, touch and hold within the text until a magnifying glass appears, drag to position the insertion point where you want it, then tap Insert Drawing. Or touch and hold with Apple Pencil (on supported models), then lift at the insertion point.
Erase a mistake. Tap the "undo arrow" to undo your last stroke. Tap the eraser to delete any element in the drawing.
Stop drawing. Tap "X" to dismiss the handwriting tools. To add more to your note, type on the keyboard or add attachments.
Resume drawing. Tap .
Show lines or grids. In a note, tap "sharrow", tap Lines & Grids, then choose a line or grid style for the note. To set the default line or grid style for new notes, go to Settings > Notes > Lines & Grids.
Edit the suggested note title. (not available in all languages) If your note starts with handwritten text, scroll to the top of the note to reveal the suggested title, then tap Edit.
Search for typed and handwritten text within a note. Tap "sharrow", tap Find in Note, then type the text you’re looking for in the search field.

Search for typed and handwritten text in all your notes. Scroll to the top of the notes list to reveal the search field, then enter the text you’re looking for.
Note: The ability to search for handwritten text isn’t available in all languages.
Create a Detailed Sketch
Although you can create a drawing directly in a note using the handwriting tools, sometimes you may need a detailed sketch to help you capture an idea or plan. In sketching mode, which provides a ruler and additional colors, you can enlarge the drawing for more precise control.
Start a sketch using the pencil, marker, or pen tool. Switch to the eraser if you make a mistake. On supported models, you can sketch with Apple Pencil.
Sketch in your note. Tap "+", tap Add Sketch, use your finger or Apple Pencil to sketch, then tap Done. To edit the sketch, tap it.

View more color choices. Swipe the palette left or right to see more colors.
Draw straight lines. Tap the ruler tool to make the ruler appear on your canvas, then draw a line along the edge of the ruler. Tap the ruler tool again to make it disappear.
Move the ruler without changing its angle. Drag the ruler with one finger.
Adjust the angle of the ruler. Touch and hold the ruler with two fingers, then rotate your fingers.
Mask a part of your sketch. Place the ruler along the edge of the area you want to cover, then start your sketch. Draw lines that start away from the ruler’s edge, then come toward it.
Hide the toolbar. Swipe the toolbar down to hide it and see just the tool you’re using. Tap the tool you’re using to see the toolbar again.
Zoom in. Pinch open so you can sketch the details. To zoom back out, pinch closed.
Tip: To navigate when you’re zoomed in, drag with two fingers.
Add another sketch to your note. Tap the "new page" icon. Or on your last sketch, swipe left with two fingers.
Scroll through all your sketches in a note. Swipe a sketch left or right with two fingers.
Start over. Tap Erase All.
Edit a sketch. Open the note that contains the sketch, then tap the sketch.
Add a Table
You can organize information into a simple table.
Create a table. Tap the  . Tap a cell to enter text, then tap Next or the press Tab to move to the next cell. If you reach the last cell and tap Next, a new row is automatically added.

Add or delete a row or column. Tap a row or column handle, then choose to add or delete. Column widths automatically adjust to fit the text. To see more columns, scroll the table left or right.
Reorder a row or column. Touch and hold a row or column handle, then drag it to a new position.
Convert the table to text. Tap a cell in the table, tap  , then tap Convert to Text.
Scan a Document
You can use the camera to scan documents into Notes, then add markup or signatures.
Scan documents. Tap  , then choose Scan Documents. When you position iPad so that the document page appears on the screen, iPad automatically captures the page. Continue to scan more pages or tap Save when you’re done.

Tip: To manually capture a page, tap  . Tap Keep Scan to save the page or tap Retake to try again.
Turn the flash on or off. Tap  .
.
Apply a filter. Tap  , then choose to scan the page as a color, grayscale, or black and white document, or as a photo.
Manually adjust a scan. Before you save a scan, you can tap the thumbnail to show tools to adjust the crop, rotation, or filter of the scan. After you save the scan, you can tap the scanned document in the note to make adjustments or capture more pages.
Mark up a saved scan. Tap the scanned document, tap "sharrow", then tap . To add your signature, tap "+", then tap Signature.
Organize Your Notes
Search for a note. Scroll to the top of the notes list to reveal the search field, then enter the text you’re looking for. If a note is locked, only its title appears in the search results.

Ask Siri. Say something like: “Show notes from today.”
Pin an important note. To keep a note at the top of the notes list, swipe right on the note in the list, then tap the pin. Your pinned notes show up on all your Apple devices where you’re signed in to iCloud using the same Apple ID.
Sort your notes. Go to Settings > Notes > Sort Notes By, then choose Date Edited, Date Created, or Title.
Search for a specific attachment. Tap  in the lower-left corner of the notes list to see thumbnails of sketches, photos, links, documents, and other attachments. (Attachments in locked notes aren’t shown.) To go to a note with a specific attachment, tap the attachment thumbnail, then tap Show in Note.
Create a folder to organize your Notes. From the notes list, tap < to view your folders. Tap New Folder (at the bottom of the folders list), then name your folder.
Delete a folder. From the notes list, tap < to view your folders. Swipe a folder left, then tap Delete.
Print a note. Tap "sharrow" at the top of the note, then tap Print.
View and edit notes from other accounts (such as Google, Yahoo!, or AOL). Go to Settings > Accounts & Passwords > Add Account, then choose an account. These notes appear in Notes on all your other iOS devices and Mac computers where you’re also signed in to that account.
Many Notes features aren’t available in these third-party accounts.
Move a note to a different folder or account. In the notes list, swipe left on the note, tap  , then choose the folder or account.
To move several notes from one folder or account to another, tap Edit in the upper-right corner of the notes list, tap the notes you want to move, then tap Move To.
Share Notes
You can send a copy of a note to a friend. Or, you can invite people to collaborate on a note in your iCloud account, and everyone will see the latest changes.
Note: You can’t collaborate on a locked note.
Send a copy of a note. In the note, tap "sharrow", then choose how to send your note. After you send the note, your friend won’t see any changes you make to the note unless you send it again.

Invite friends to collaborate on a note. Tap  , then choose how to send your invitation.
Add people, remove them, or stop collaborating on a note. In a note with collaborators, tap  .
.
Lock Notes
Lock notes that contain sensitive information with a password or Touch ID (on supported models). You can lock notes that you want to keep private from anyone who might use your device. Notes uses a single password for all your locked notes, on all of your devices.
You can view locked notes that are in your iCloud account on your iOS devices with iOS 9.3 or later and Mac computers with OS X 10.11.4 or later.
You can lock notes that include images, sketches, maps, and web attachments, but not other types of attachments like video, PDFs, and iWork documents. You can’t lock notes that you’ve shared.
Set or change your notes password. Go to Settings > Notes > Password. This password applies to all your locked notes.
Set Touch ID to unlock your notes. Go to Settings > Notes > Password, then turn on Use Touch ID.
Add a lock to a note. In the note, tap "sharrow", then tap Lock Note.
When a note is locked, the title remains visible in the notes list.
Unlock your notes. Tap a locked note, tap View Note, then follow the instructions.
Unlocking one note unlocks all of your notes until one of the following happens: your session times out, you tap the lock icon at the top of the screen, you tap Lock Now at the bottom of the notes list, or you lock your iPad.
Remove a lock from a note. Tap "sharrow", then tap Remove Lock.
Forgot your notes password? Go to Settings > Notes > Password, then tap Reset Password. The new password applies to notes you lock from now on. Notes that already have a password aren’t affected.
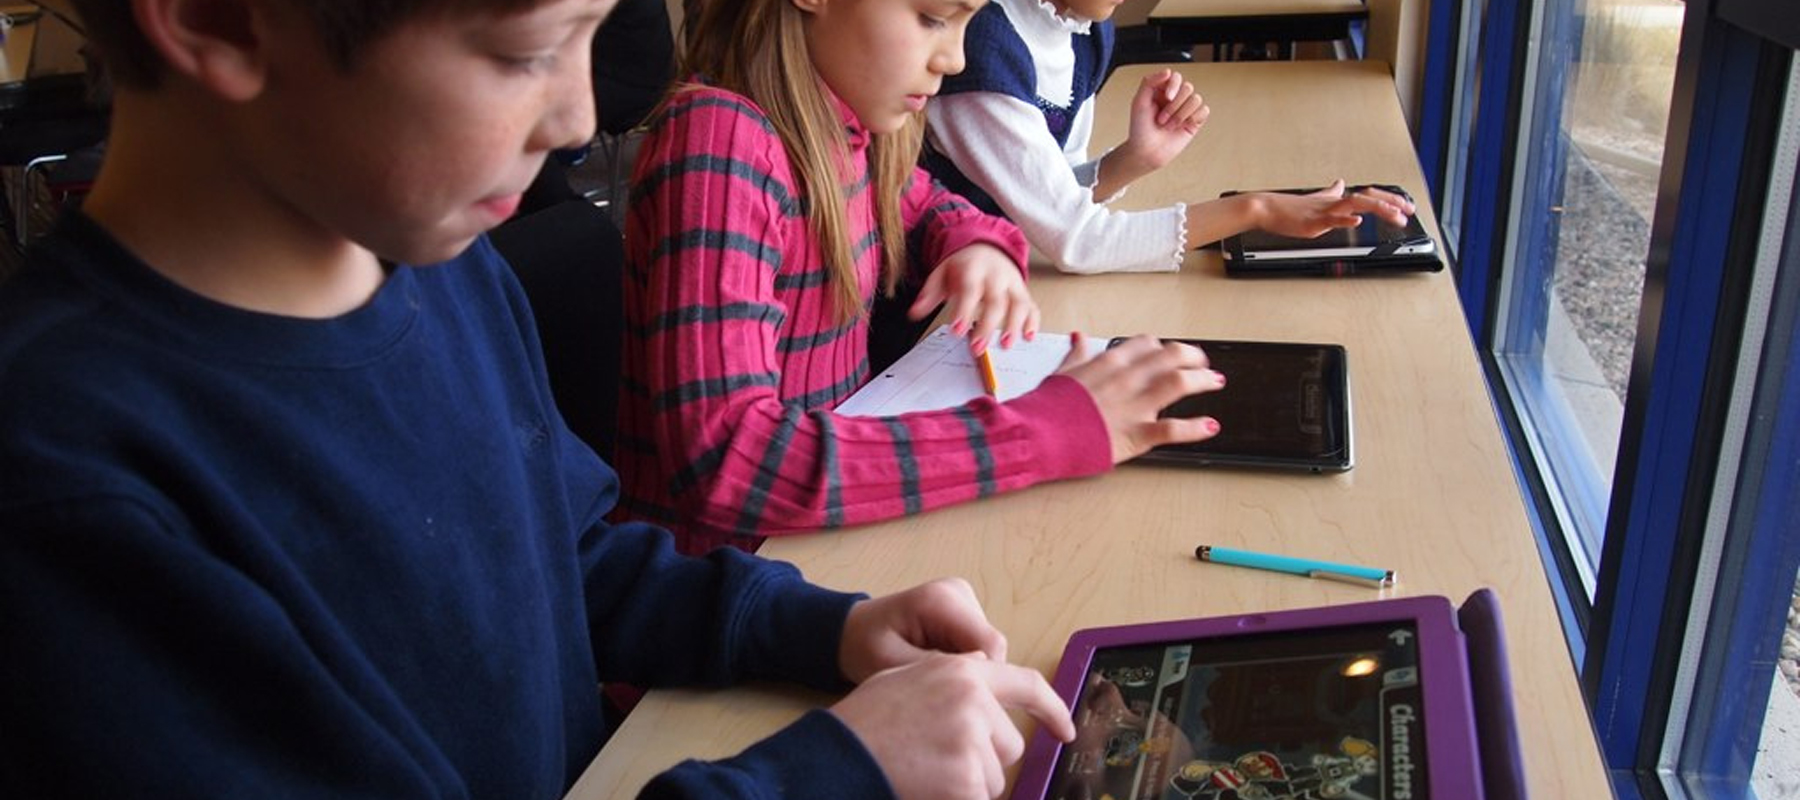
K-2 Using Notes

Scan a document, writing paper, or a worksheet to be marked up on the iPad.

Instructions
- Open the Notes app and create a new note, tap the “+” to scan your document.
- Position entire document in view (a yellow box may appear that is your iPad trying to crop) > white button > crop if needed > Keep Scan > Save
- Tap on the picture of the scanned document/s. This will open in full screen view.
- Tap the "sharrow"
- Select the Markup option
- Lead your class through the document
3-5 USING NOTES

Students create a note that introduces themselves to the class and shares their favorite things.

Instructions
- Create a new note.
- In that note, students add a picture of themselves from the camera roll and type something about themselves.
- Students find pictures on safari of things they like and drag and drop them into the same note.
- Use markup tools to label pictures or identify their favorite things.
- When finished, students share their work to the teacher through Classroom/Airdrop/email.
6-8 USING NOTES

Create a voyage sailing to different ports on Lake Michigan and share information on each location.

Instructions
- Locate Lake Michigan on a map and screen shot the whole lake.
- Add the image to the notes app and use the markup tool to draw the voyage path.
- Use safari to research images of the different ports and add those images to the same note.
- Label the images and add information about that port.
- When finished, students share their work to the teacher through Classroom/Airdrop/email.
9-12 USING NOTES

Create a workflow using the built-in app. The workflow should spark creativity and productivity.

Instructions
- As a class, create 5-10 questions about any topic in the notes app.
- Splitting the screen with Safari, students research answers to the questions and sketch their notes on the topic.
- Students also pull in images they have taken in the class to answer the questions.
- When finished, students share their work to the teacher through Classroom/Airdrop/email.
The Notes App- the Hidden Gem of the iPad
Author Mark Herring gives awesome ideas for using the Notes App in the classroom.

The iPad offers many built in Accessibility tools that allow every student in your classroom to feel empowered and engaged. Here are a few ways you can reach all learners using these Accessibility Tools in your classroom:
Writing inside the Notes app can be made more efficient by using some of these features:
- Enlarge text size (settings>general>accessibility Vision) This can be helpful for everyone and it works in a variety of apps including Notes, Calendar, Reminders, News and more.
- Change to more appealing colors in Display Accommodations (settings>general>accessibility Display Accommodations) This may be helpful for students who are color blind and for students who have difficulty reading text on the iPad.
- Text Replacement (Settings>General>Keyboards>Text Replacement) allows students to shorten or abbreviate frequently used words. Omw = On my way! Use text replacement to make it faster and easier to enter full names, address, etc...
- Pin important notes to the top of the list so that every time Notes is open, the important note is visible, while all the other notes move down the list. To pin a note, swipe the name of the note so that it extends to the right. An icon of a tack shows up letting you know it was pinned. Swiping the name of the note again removes the pin feature.
- Help students organize notes into folders. A new folder can be created by tapping on the left arrow in the upper left corner of the Notes app. Tap ‘New Folder’ at the bottom of the screen to create folders.