

Navigation

Navigation
When you search on iPad, you get results from the Internet, from media and other content on your iPad, from iTunes and the App Store, and from your apps, like Maps and Contacts. In Settings, you can specify which apps you want to be included in search results.
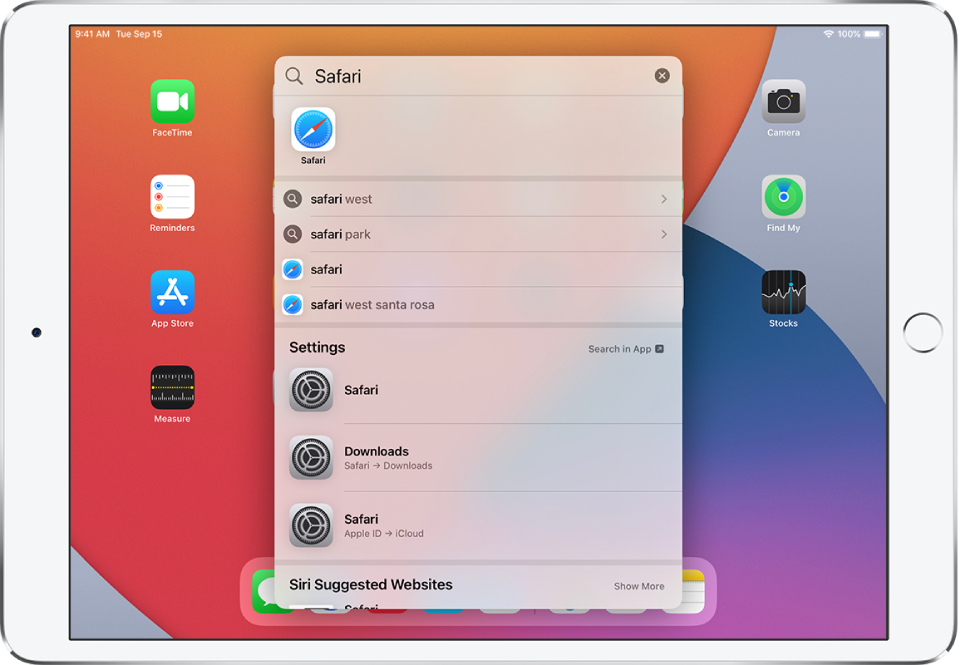
Search with iPad. To show Search from the Home screen, swipe down from the center. To show Search from an app, swipe down from the top, then swipe from the left edge of the screen.
- Hide the keyboard and see more results on the screen: Tap ther keyboard down icon.
- Open a suggested app: Tap it.
- Get more information about a search suggestion: Tap it, then tap one of the results to open it.
- Start a new search: Tap the "x" in the search field.
Choose which apps to include in search. Go to Settings > Siri & Search, tap an app, then turn Search & Siri Suggestions off or on.
Turn off Suggestions in Search. Go to Settings > Siri & Search, then turn off Suggestions in Search.
Turn off Location Services for suggestions. Go to Settings > Privacy > Location Services. Tap System Services, then turn off Location-Based Suggestions.
Search in apps. Many apps include a search field so you can find something within the app. For example, in the Maps app, you can search for a specific location. Tap the search field and type your search.
While using one app, you can easily switch to another.
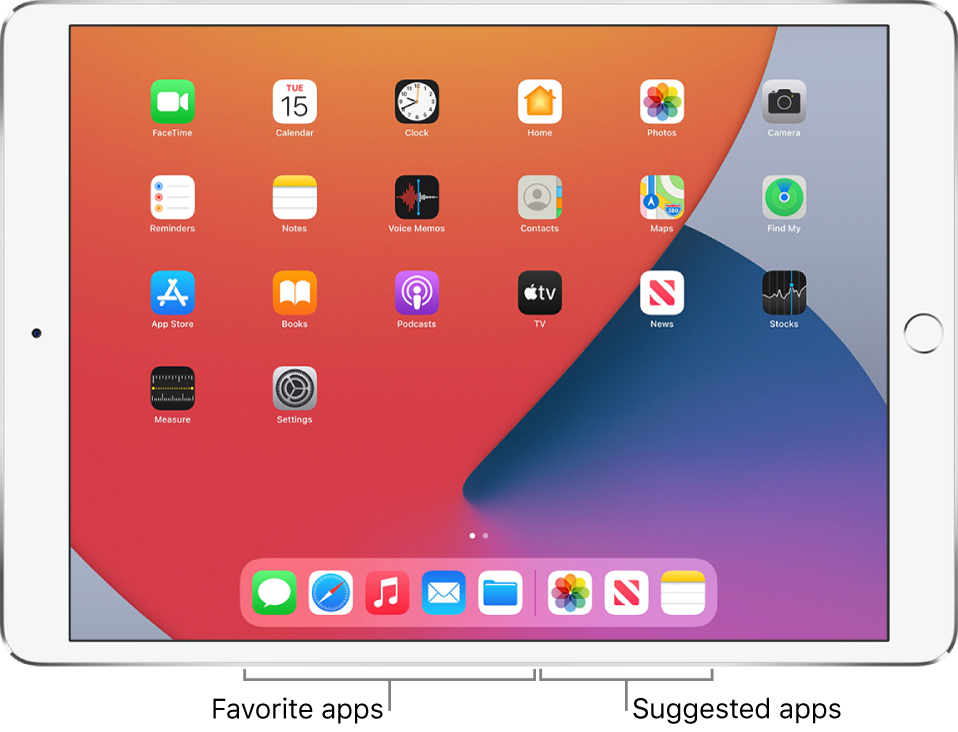
Open an app from the Dock. Swipe up from the bottom to reveal the Dock, then tap an app. Favorite apps are on the left side of the Dock, and suggested apps—like ones you opened recently and ones open on your iPhone or Mac—appear on the right side of the Dock.
Use the App Switcher. To reveal all your open apps, swipe up from the bottom edge. If the Dock isn’t already showing when you begin to swipe, swipe long enough to display the Dock then the App Switcher. You can also double-click the Home button. To see more apps, swipe right. To switch to another app, tap it.

Swipe between open apps. Swipe right or left with four or five fingers. To turn off the multi-finger swipe gesture, go to Settings > General > Multitasking & Dock.
Close an app. If an app isn’t working properly, you can force it to close. (Typically, there is no reason to close an app; closing it doesn’t save significant battery power) In the App Switcher, swipe up on the app. Then try opening the app again.
Multiple apps at the same time
On supported models, you can work with more than one app at the same time.
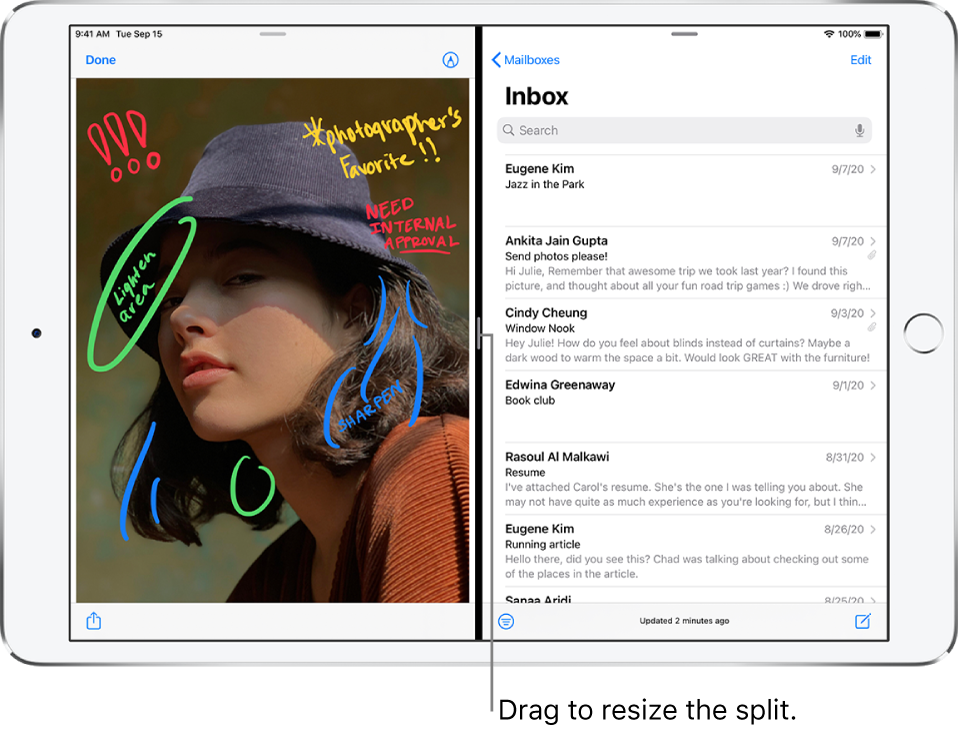
Split View- Use Split View to keep two apps open in resizable views.
Slide Over- On supported models, slide an app in front of another open app, or in front of a split screen view.

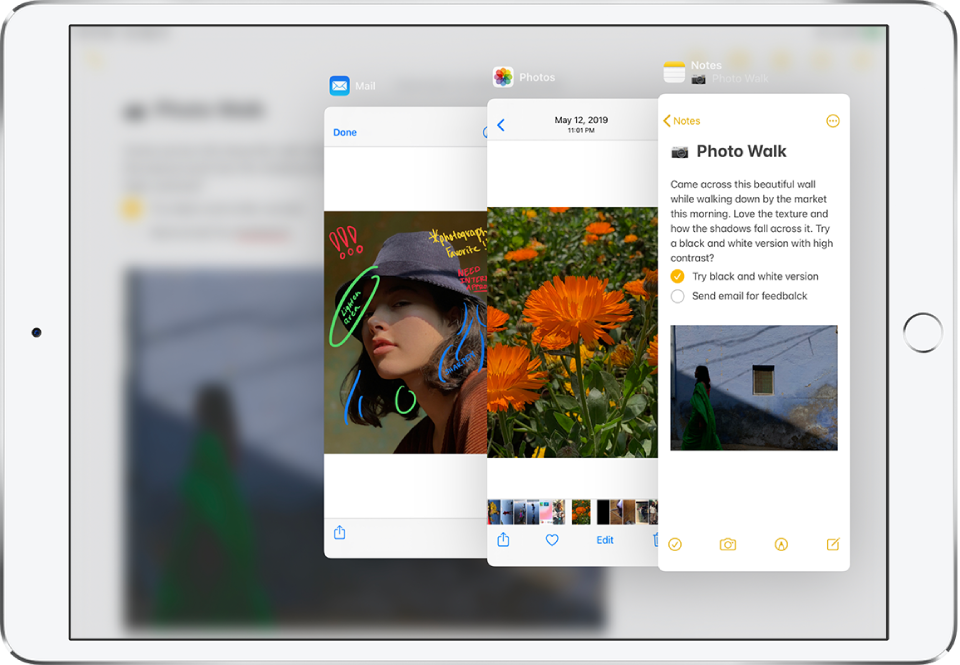
Switch between apps in Slide Over
- Swipe right along the bottom of the Slide Over window, or do the following:
- Swipe up from the bottom of the Slide Over window.
- Tap the app you want to view, if it’s visible.
- If you don’t see it, swipe right through the apps.
Picture and Picture- On supported models, you can watch a movie or use FaceTime while you use other apps.
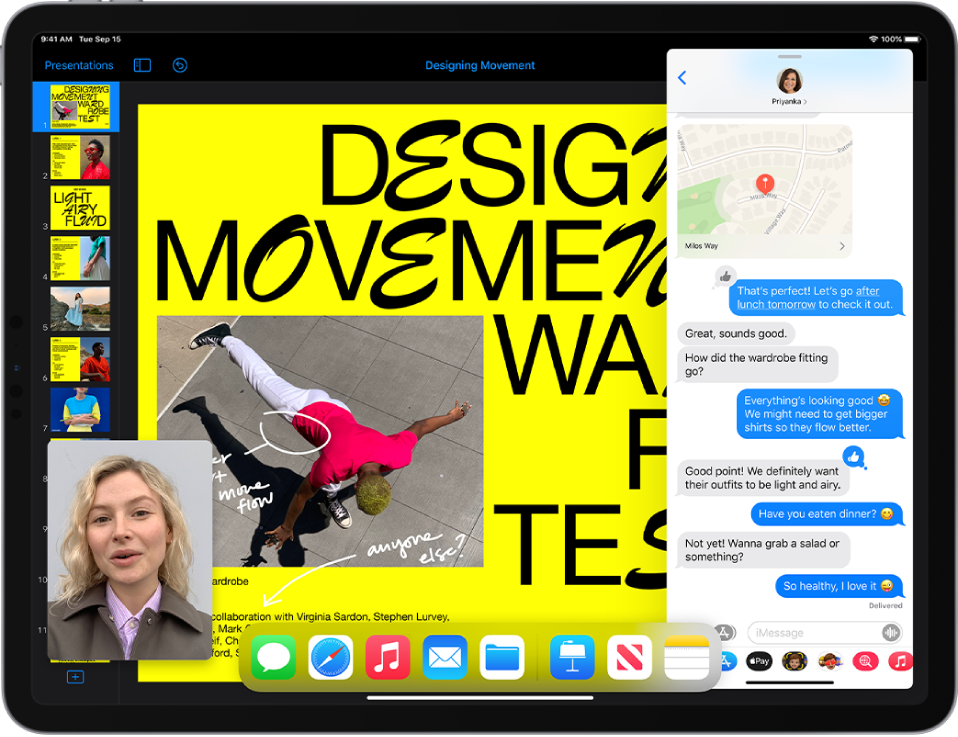
When using FaceTime or watching a video, tap or press the Home button (on an iPad with a Home button).
The video window scales down to a corner of your screen so you can see the Home Screen and open other apps. With the video window showing, you can do any of the following:
- Resize the video window: To make the small video window larger, pinch open. To shrink it again, pinch closed.
- Show and hide controls: Tap the video window.
- Move the video window: Drag it to a different corner of the screen.
- Hide the video window: Drag it off the left or right edge of the screen.
- Close the video window: Tap.
- Return to a full FaceTime or video screen: Tap in the small video window.
With drag and drop, you can use a finger to copy items from one app to another, or move items within an app. For example, you can drag text from Safari into an email, an image from Photos into a note, or a calendar event into a text message. (Not all third-party apps support drag and drop.)

Move an item. Touch and hold the item until it lifts up (if it’s text, select it first), then drag it to another location within the app. If you drag to the bottom or top of a long document, it automatically scrolls.
Copy an item between open apps. Open the two apps, then touch and hold the item until it lifts up (if it’s text, select it first). Drag it to the other app. As you drag, "+" appears wherever you can drop the item. If you drag to the bottom or top of a long document, it automatically scrolls. If you want to drag the item to a new note or email message, for example, open the new note or email message first so you can drag the item directly to it.
Copy an item to an app on the Home screen or in the Dock. Touch and hold the item until it lifts up (if it’s text, select it first). While you continue to hold the item, use another finger to click the Home button, or swipe up from the bottom to display the Dock. Drag the item over the other app to open it (a ghost image of the item appears under your finger as you drag). You can drag over items in the app to navigate to where you want to drop the item (as you drag, "+" appears wherever you can drop the item). For example, you can drag over the notes list to open the note where you want to drop the item, or you can use another finger to open a new note where you can drop the item.
Select multiple items to drag and drop. Touch and hold an item, drag it slightly, then continue holding it while you tap additional items with another finger. A badge indicates the number of selected items. You can then drag all of the items together.
If you change your mind. Lift your finger before dragging, or drag the item off the screen.
Type and Edit Text
Tap a text field to see the onscreen keyboard, then tap letters to type.
You can also rest your fingers on the onscreen keyboard, then start typing normally. The placement of the keys invisibly adjusts based on where you’ve rested your fingers. If you stop typing, the placement of the keys resets after two seconds (on supported models).

Type uppercase letters. Tap Shift or touch the Shift key and slide to a letter.
Turn on Caps Lock. Double-tap Shift.
Enter numbers, punctuation, or symbols. To enter the character from the top of a key, swipe down on the key. Or tap the Number key or the Symbol key , then type.
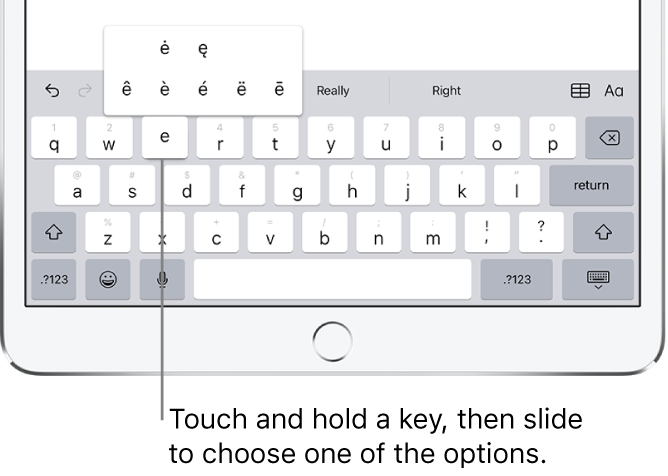
Enter accented letters or other alternate characters. Touch and hold a key, then slide to choose one of the options.
Quickly end a sentence with a period and a space. Double-tap the space bar.
Correct spelling. If you see a word underlined in red, tap it to see suggested corrections. If the word you want doesn’t appear, type the correction.
Hide the onscreen keyboard. Tap the Keyboard key .
Set options for typing or add keyboards. Touch and hold or , then slide to Keyboard settings. Or go to Settings > General > Keyboard.
Select text. Tap the insertion point to display the selection options. Or double-tap a word to select it. Drag the grab points to select more or less text. In read-only documents, such as webpages, touch and hold to select a word.
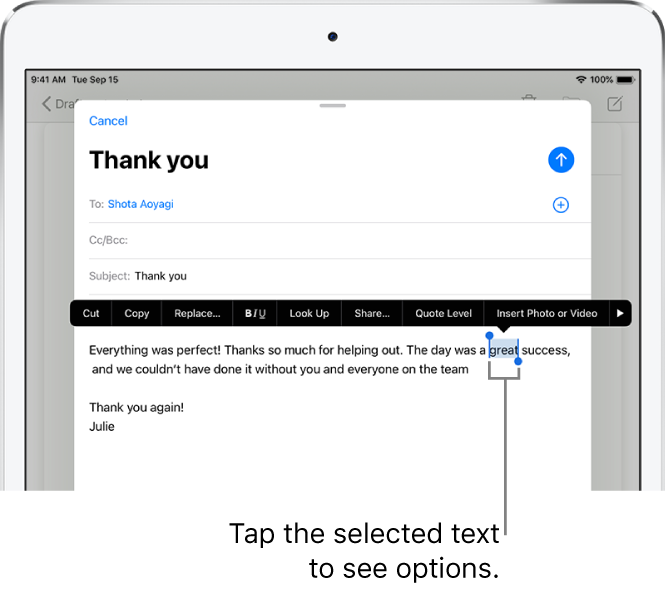
You can cut, copy, or paste over selected text. You can also use drag and drop to move selected text within an app and to copy and paste it to other apps.
Revise text. Touch and hold the text to show the magnifying glass, then drag to position the insertion point.

Predictive Text
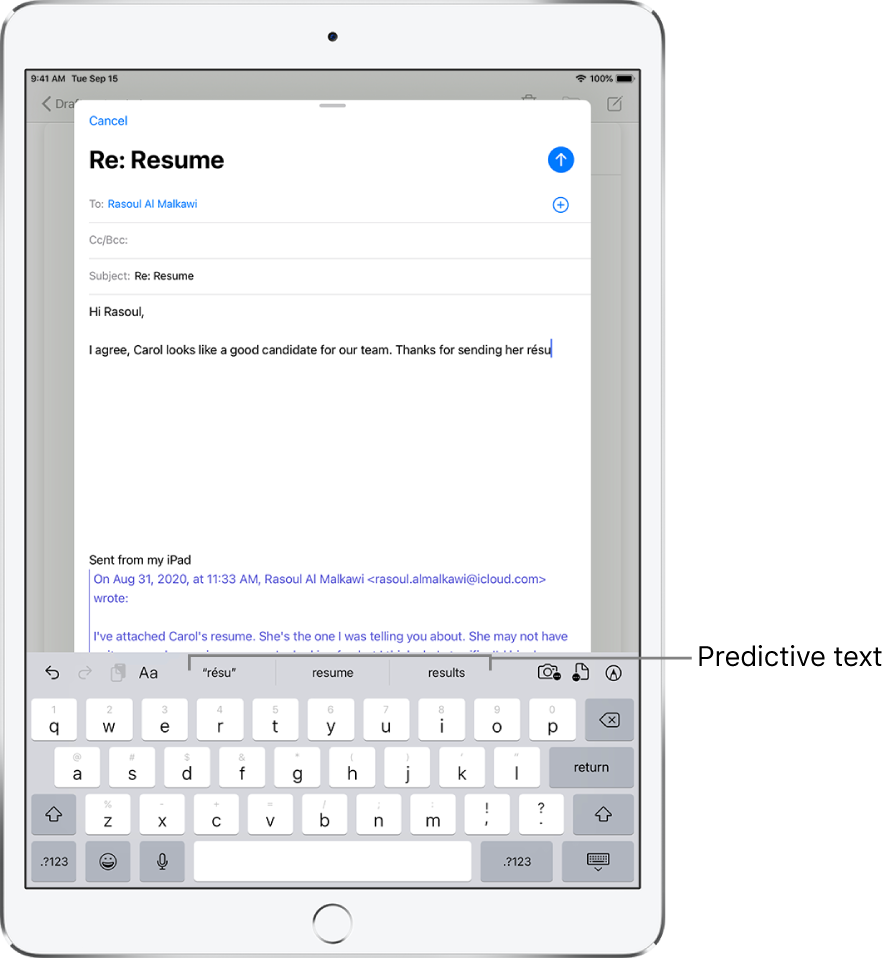
As you write, Siri predicts your next word, suggests emoji that could take the place of your word, and makes other suggestions based on your recent activity and information from your apps (not available for all languages).
- “My number is ,” your phone number appears as an option.
- “I’m at ,” your current location appears as an option.
Tap a word to choose it, or accept a highlighted prediction by entering a space or punctuation. When you tap a suggested word, a space appears after the word. If you enter a comma, period, or other punctuation, the space is deleted. Reject a suggestion by tapping your original word (shown as the predictive text option with quotation marks).
Turn off predictive text. Touch and hold the smile icon or the globe at the bottom of the keyboard, slide to Keyboard settings, then turn off Predictive.
When you turn off predictive text, iPad may still try to suggest corrections for misspelled words. To accept a correction, enter a space or punctuation, or tap return. To reject a correction, tap the “x.” If you reject the same suggestion a few times, iPad stops suggesting it.
Dictate
Dictate
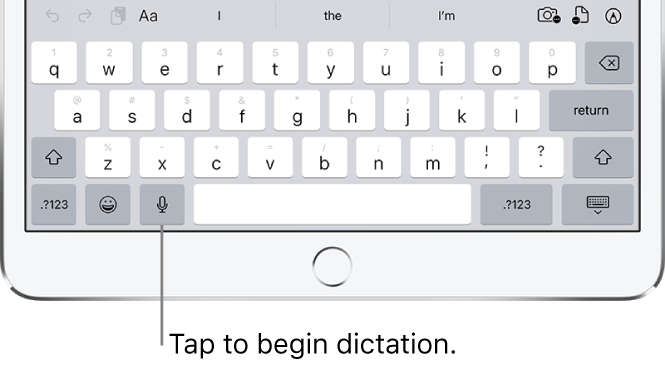
You can dictate text instead of typing it. Make sure Enable Dictation is turned on (go to Settings > General > Keyboard, then turn on Enable Dictation). On iPad Pro models, you can use dictation when you’re not connected to the Internet.
Dictate text. Tap the microphone on the iPad keyboard, then speak. When you finish, tap the keyboard icon. To insert text by dictating, tap to place the insertion point, then tap the microphone. You can also replace selected text by dictating.
Add punctuation or format text.
While dictating text, say the punctuation or formatting.
For example, “Dear Mary comma the check is in the mail exclamation mark” becomes “Dear Mary, the check is in the mail!” Punctuation and formatting commands include the following:
- period
- comma
- exclamation point
- question mark
- dollar sign
- open parenthesis … close parenthesis
- quote … end quote
- new paragraph
- new line
- colon
- semicolon
- cap—to capitalize the next word
- caps on … caps off—to capitalize the first character of each word
- all caps—to make the next word all uppercase
- all caps on … all caps off—to make the enclosed words all uppercase
- no caps on … no caps off—to make the enclosed words all lowercase
- no space—to eliminate the space between two words (not available for all languages)
- no space on … no space off—to run a series of words together (not available for all languages)
- smiley—to insert :-)
- frowny—to insert :-(
- winky—to insert ;-)
- hash tag
Save Keystrokes
Save Keystrokes
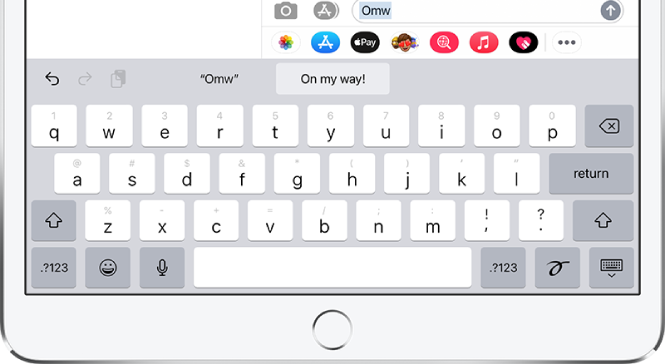
A shortcut lets you enter a word or phrase by typing just a few characters. For example, type “omw” to enter “On my way!” That one’s already set up for you, but you can also add your own.
Create text replacements.
- Do one of the following:
- With an onscreen keyboard: Touch and hold "smiley face" or "globe", tap Keyboard Settings, then tap Text Replacement.
- With an external keyboard: Go to Settings > General > Keyboard, then tap Text Replacement
-
Tap + at the top right.
- Type a phrase in the Phrase field and the text shortcut you want to use for it in the Shortcut field.
Have a word or phrase you use and don’t want it corrected? Create a text replacement by adding your phrase, but leave the Shortcut field blank.
Use iCloud to keep your personal dictionary up to date on your other devices. Go to Settings > [your name] > iCloud, then turn on iCloud Drive.
Keyboard Options
Keyboard layouts
You can type with a split keyboard that’s at the bottom of the screen, or undocked and in the middle of the screen.

Adjust the keyboard. Touch and hold the keyboard icon, then:
- Use a split keyboard: Slide your finger to Split, then release. Or spread the keyboard apart from the middle using two fingers.
- Move the keyboard to the middle of the screen: Slide your finger to Undock, then release.
- Return to a full keyboard: Slide your finger to Dock and Merge, then release.
- Return a full keyboard to the bottom of the screen: Slide your finger to Dock, then release.
Turn Split Keyboard on or off. Touch and hold the "smiley" or "world", slide to Keyboard settings, then select Split Keyboard. Or go to Settings > General > Keyboard, then turn Split Keyboard on or off.
Note: The split keyboard option is not available on iPad Pro (12.9-inch).
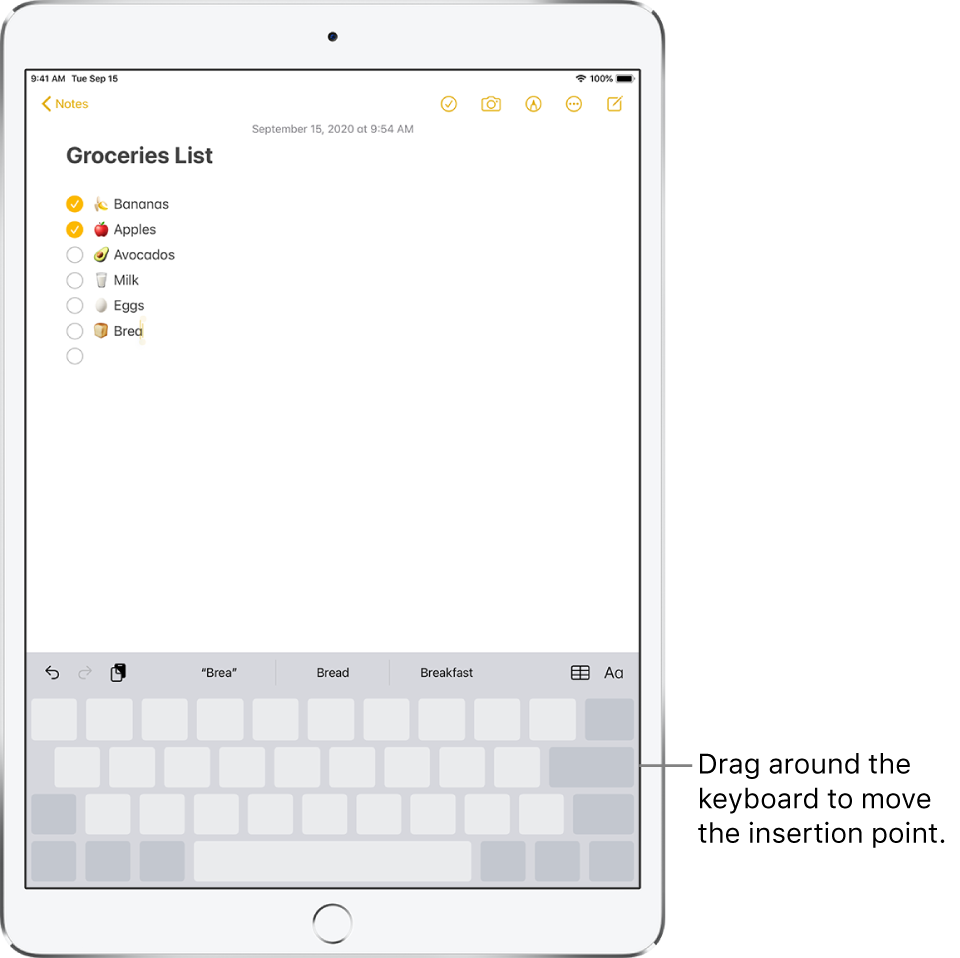
Turn the onscreen keyboard into a trackpad
- Touch and hold the Space bar with one finger until the keyboard turns light gray.
- Move the insertion point by dragging around the keyboard.
- To select text with handles, continue touching and holding the keyboard until handles appear on the insertion point, then move your fingers.
To use the trackpad to move the insertion point, drag the insertion point to a new location before handles appear.
Using Wireless Keyboards
You can use an Apple as well as other Wireless Keyboards (available separately) to enter text on your iPad. The keyboard connects via Bluetooth, so you must first pair it with iPad.
Pair an Apple Wireless Keyboard with iPad. Turn the keyboard on. On iPad, go to Settings > Bluetooth and turn on Bluetooth, then tap the keyboard when it appears in the Devices list.
Once it’s paired, the keyboard reconnects to iPad whenever it’s in range—up to about 33 feet (10 meters). When it’s connected, the onscreen keyboard doesn’t appear.